|
PRESENTATION WIZARD AND TEMPLATES
Advanced And Beginner Users
This lesson is for both advanced and beginner users.
This lesson will explain the Presentation Wizard by using one of the templates
that comes with OpenOffice.
Open And Use The Presentation Wizard
-
OpenOffice has two ready-made presentation templates, Introducing a New Product and Recommendation of a Strategy.
-
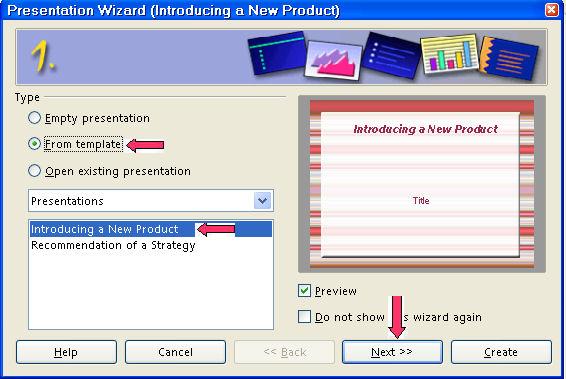
Click File > New > Presentation > From Template. (Window 1 of the “Presentation Wizard” appears.)
-
Click Next. (Window 1 of the “Presentation Wizard” reappears.)
-
If not already selected, select Introducing a New Product.
-
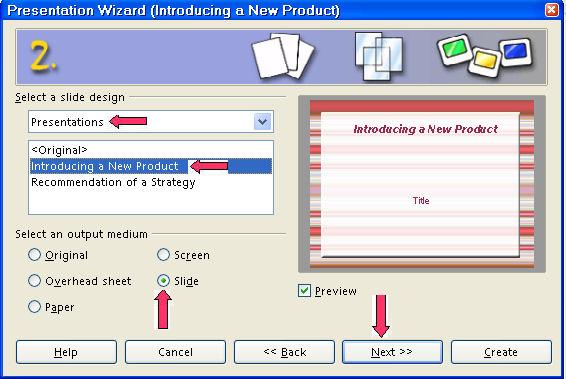
Click Next. (Window 2 of the "Presentation Wizard" appears. Note that "Introducing
a New Product" is highlighted. If you prefer another background than
the default, under "Select a slide design", click "Presentation backgrounds"
and select your choice.) In the dialog box under Select a slide design, click Presentation if it is not already selected. In the dialog box under Select an output medium, click Slide.
-
Click Next. (Window 3 of "Presentation Wizard" appears.) Under Select a slide transition, use the default for Effect and Speed. Under Select Presentation Type, click Automatic. In the Duration of pages dialog box, type 11 in the seconds place. In the Duration of pause, type 11 in the seconds place. (Highlight and type the numbers or use the  to select a number. The format for the numbers is: 00.00.11. The "hours setting" is before the first decimal (period). The
"minutes setting" is before the second decimal. The "seconds
setting" is before the third decimal.) to select a number. The format for the numbers is: 00.00.11. The "hours setting" is before the first decimal (period). The
"minutes setting" is before the second decimal. The "seconds
setting" is before the third decimal.)

-
Note: If you use the default settings, click Create and you have your presentation ready for pictures, text. Etc.

-
Under Describe your basic ideas, in the dialog box under What is your name or the name of your company?, type The Save Time Company. In the dialog box under What is the subject of your presentation?, type A New Watch. In the dialog box under Further ideas to be presented, type Use the Stopwatch Function and Use The Date Function.
-
Click Next. (Window 4 of the 'Presentation Wizard" appears.)

-
Under Choose your pages, select what you want in your presentation or use the default settings.
Click Create. (Note: "Next" is grayed. "Create" is the next step.)

-
Click Slide Transition if it is not already selected. To see your presentation that you just
made, click Slide Show.

Save And Close Your Presentation
-
Click File > Save As. In the Save in: pull-down menu box, click My Documents (if it is not already selected). In the Save as type:" box, click OpenDocument Presentation (.odp) (if it is not already selected).
-
In the File name: box, type My Slide Show .
-
Click Save. (" My Slide Show" is saved. The file, "My Slide Show" is still on the screen.)
-
Click File > Close. (The file, " My Slide Show", is no longer on the screen.)
To Watch "My Slide Show” at a Later Time
-
Click File > Open. (The "Open" window appears.)
-
In the menu below the "Look in:" dialog box, click My Documents if it is not already there. In the menu below the File name: dialog box, click My Slide Show. ("My Slide Show" appears on your screen.)
-
Click Slide Transition if it is not already selected. To see your presentation that you just
made, click Slide Show.
NOTE
Tutorials are improved by input from users. We solicit your constructive
criticism.
Click here to E-mail your suggestions and comments
Edited by Sue Barron
Presentation_Wizard_And_Templates 08/19/07
Last modified: 2008-04-30 01:42 UTC
|

